
Make a protective face mask from a bandana in 5 easy steps
The Center for Disease Control and Prevention (CDC) just set new guidelines advising that all Americans wear non-medical masks in public to prevent the spread of coronavirus (COVID-19). Recent studies have found that both asymptomatic people (those who aren’t showing signs of coronavirus) and pre-symptomatic people (those who will eventually develop symptoms) can be carriers of the virus and therefore infect other people—even if they’re practicing social distancing.
Which is where face masks come in. Since there’s a national shortage of medical face masks, the CDC recommends that we reserve those for healthcare workers and first responders and instead wear cloth face masks when leaving our homes. Before you start buying or making them for all your loved ones, however, know that the CDC notes that “cloth face coverings should not be placed on young children under age 2, anyone who has trouble breathing, or is unconscious, incapacitated or otherwise unable to remove the mask without assistance.”
Cloth face masks are slowly making their way into the market, but if you don’t want to wait to buy one, you can make one by yourself. Making a face mask from fabric, such as a bandana, is easy and doesn’t involve any sewing. Check out this how-to from Colin Hanks:
A post shared by Colin Hanks (@colinhanks) on Apr 4, 2020 at 3:53pm PDT
If you still have questions, we understand. See below for some advice on making fabric face masks before you get going on your own.
What should I do before making a face mask from a bandana?
First, wash your hands for at least 20 seconds and sanitize the surface where you’ll be placing the bandana.
What dimensions should my bandana be?
You’re going to want a bandana or piece of fabric that is 20″ x 20″ for a nice, big square.
If I don’t have a bandana, how can I make a fabric face mask?
You can cut any piece of cloth to fit those 20″ x 20″ dimensions.
See? Easy. If you want to see how to make a face mask from a bandana with squared dimensions, see below:
Step 1: Spread out your bandana

First, spread out your square-shaped bandana on a flat surface.
[suhbeader]Step 2: Fold the bandana[/subheader]
Then, fold the bandana in half. After that, take a coffee filter and cut it in half horizontally. Place the top half of the coffee filter in the middle of the bandana, then fold the top third over it, then fold the bottom third over that. In the end, it should look like the photo above.
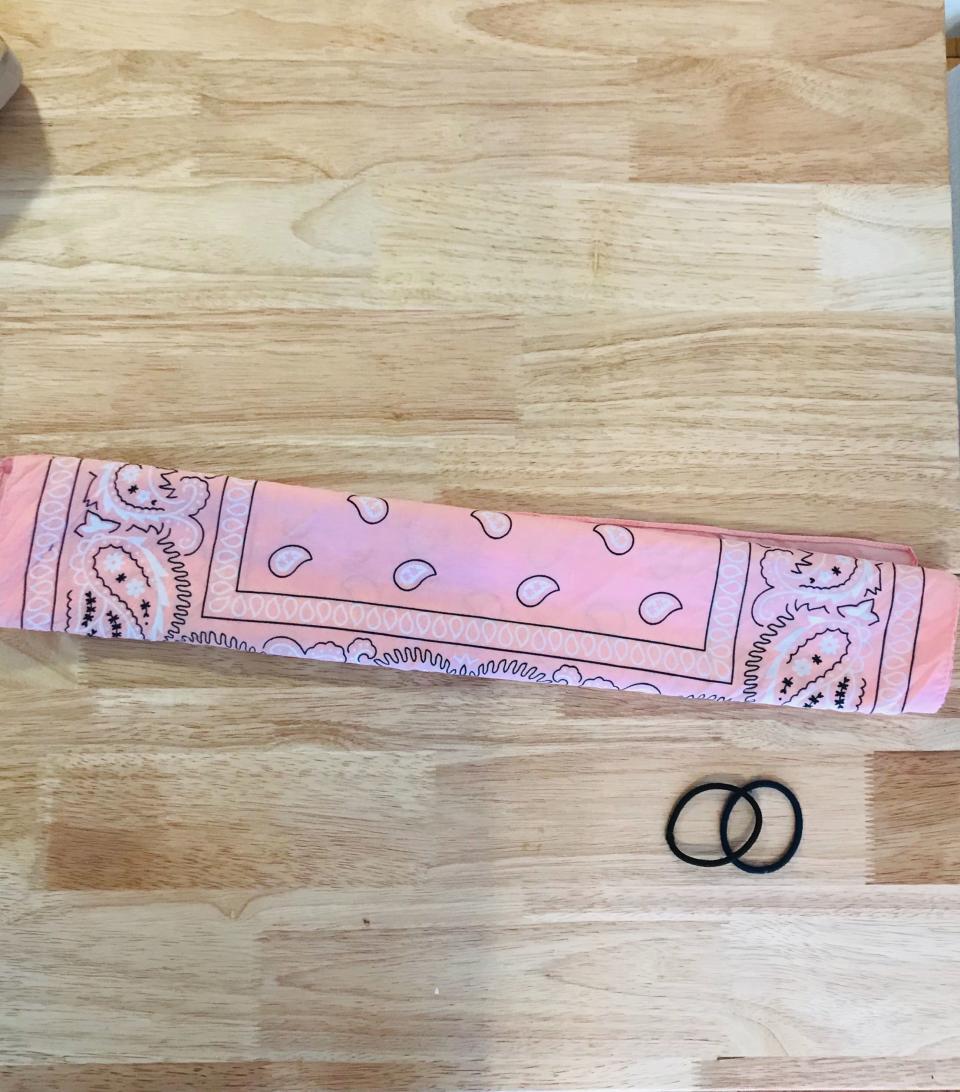
Step 3: Place hair ties on both sides of the bandana
Take two hair ties and slip them on the sides. Leave a 6″ distance between both bands.
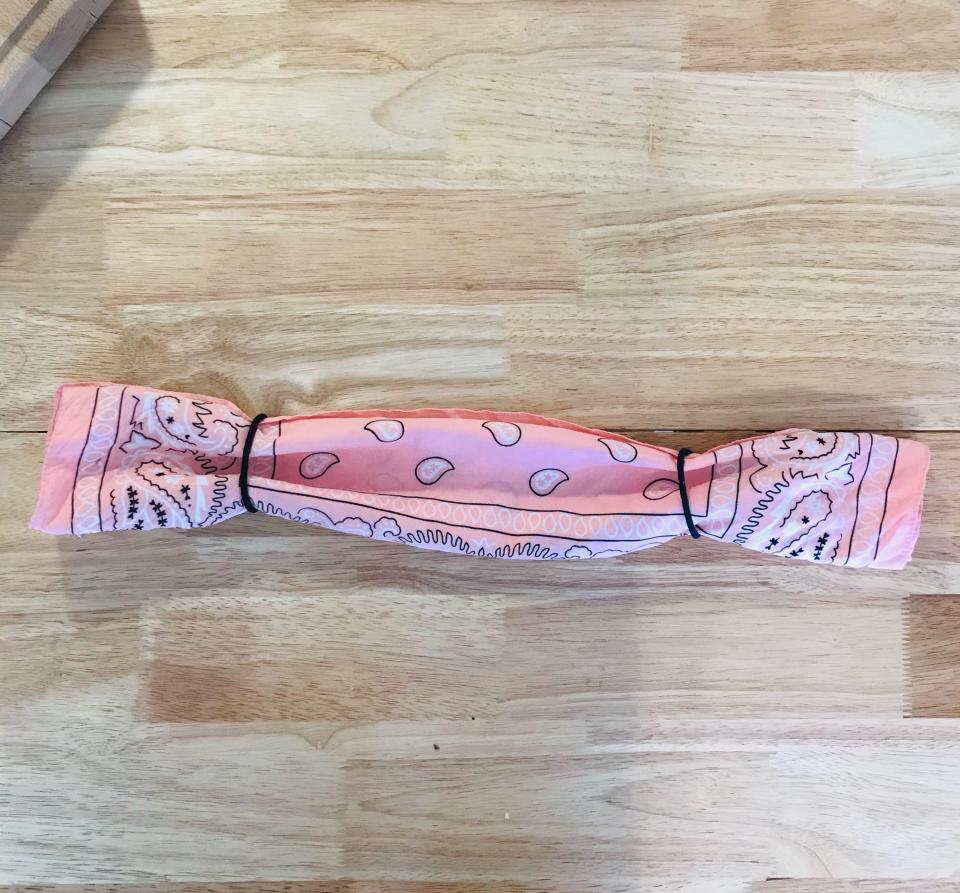
Step 4: Fold the edges inward

Bring the edges to meet and tuck one edge into the inside of the other (imagine it getting gobbled up). This is going to be the area that faces your mouth.
Step 5: Place hair ties around your ears

Bring your new fabric mask up to your face and use the hair ties to secure it in place.
And now you have a fabric face mask! Make sure that in addition to washing your hands before and after, you follow the CDC’s advice to prevent cross-contamination which says, “individuals should be careful not to touch their eyes, nose, and mouth when removing their face covering and wash hands immediately after removing.” Once you’ve safely removed it, either toss it in the washing machine or hand wash it.
As information about the coronavirus pandemic rapidly changes, HelloGiggles is committed to providing accurate and helpful coverage to our readers. As such, some of the information in this story may have changed after publication. For the latest on COVID-19, we encourage you to use online resources from CDC, WHO, and local public health departments, and visit our coronavirus hub.
